Windows 7 which has been launched since 2019 2009 is one of Microsoft's operating systems that is quite popular and is still used today. According to Telecom.com, Microsoft Windows operating system 7 still have 100 million users globally.
One of the many uses today is Windows 7 as a virtual machine operating system. Windows 7 has many advantages that make it popular, especially in relation to high compatibility and comfort of use.
This guide will explain the steps to install Windows 7 in a complete and easy way that you can apply to physical or virtual computers. If you are using a physical computer, You can use Windows Bootable USB media for UEFI based Systems or Bootable USB Drive for BIOS based Systems.
List of contents
Preparation
To facilitate the installation process and avoid system failure, There are several things you need to prepare and pay attention to as follows:
- Know the type of processor you have. 32-bit processors can only run Windows 7 32-bit version. And, 64-bit processors can run Windows 7 64-bit or 32-bit version.
- Make sure the minimum hardware requirements are met.
- 64-bit or 32-bit version of Windows-7 installer media according to processor. Can be a Bootable USB or CD/DVD Windows-7, right file ISO image (*.iso) Windows-7 if you are using a virtual machine.
- Hardware drivers (optional). You usually get this when you buy a new computer. You can also download from the computer manufacturer's website according to the version of the system you want to install, 32-bit or 64-bit.
Minimum Requirements
Your device must meet the following minimum requirements:
| Architecture | 32-bit | 64-bit |
|---|---|---|
| Processor | 1 GHz (x86) | 1 GHz (x64) |
| Memory (RAM) | 1 GB | 2 GB |
| Graphics Processor | DirectX 9 | DirectX 9 |
| Hard Disk | 16 GB | 20 GB |
Steps to Install Windows 7
Steps 1: Boot the Computer from the Installer Media
Booting is the process of loading and running software (operating system) into memory and then the computer is ready to receive commands from the user. To boot the computer from the Windows installer media 7, do the following:
- Insert the Windows installer media 7 appropriate device on your computer and then restart the computer.
- You may need to adjust the order Boot Of BIOS. Learn how booting computer from USB/CD/DVD.
- After successfully booting from the Windows installer media 7, your computer screen displays text Press any key to boot from CD or DVD…
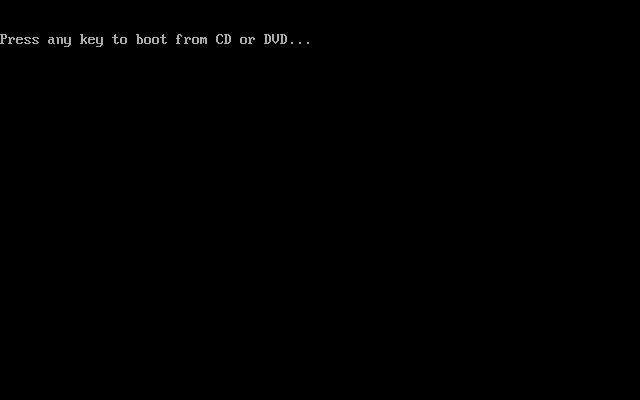
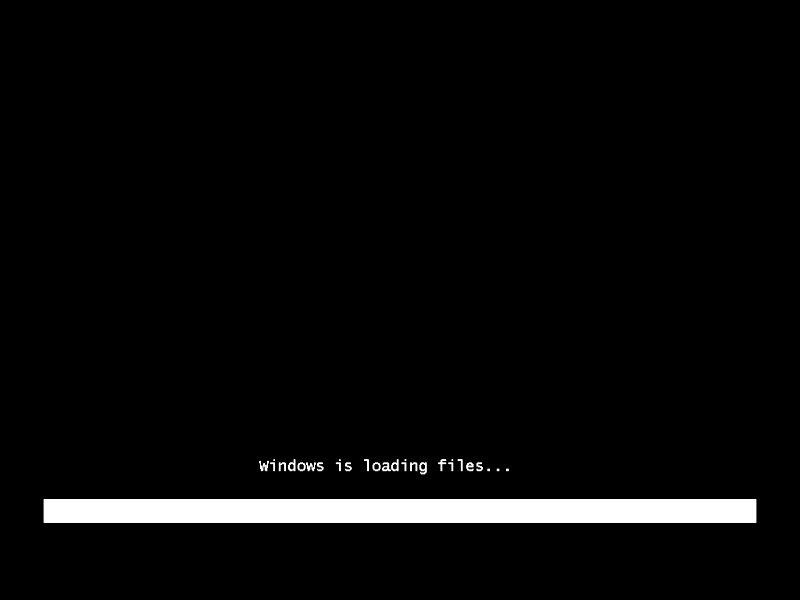
- Press any key on your keyboard and the computer will load the installation file, wait until the next process.
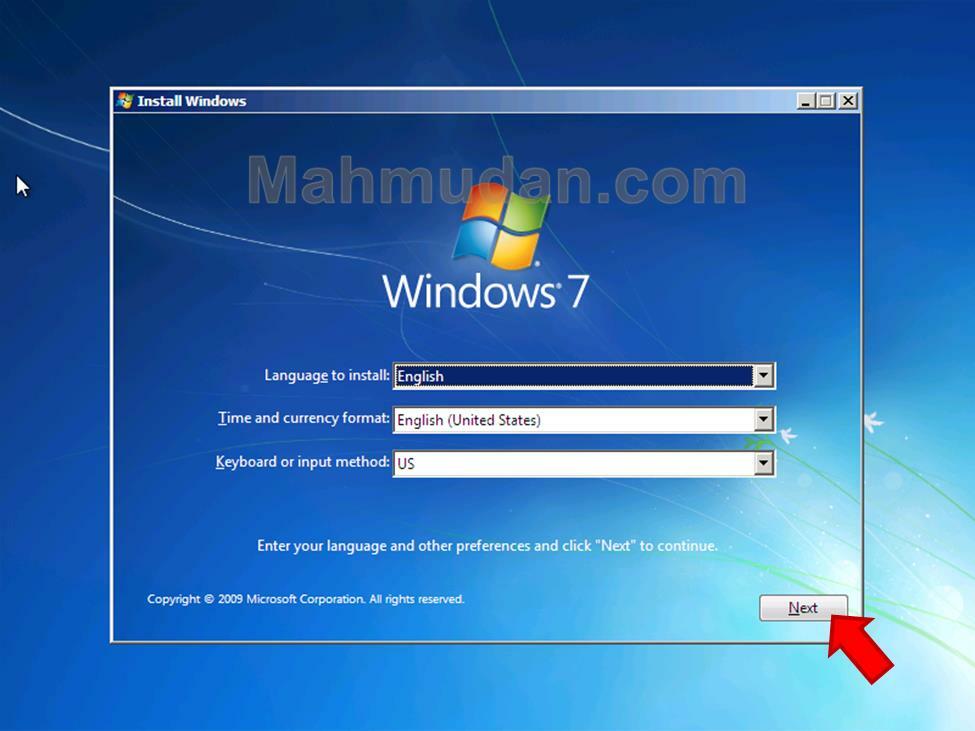
- After loading the required files, The system displays the option to change the language, time format and keyboard. You can choose to change or continue immediately with the click of a button Next
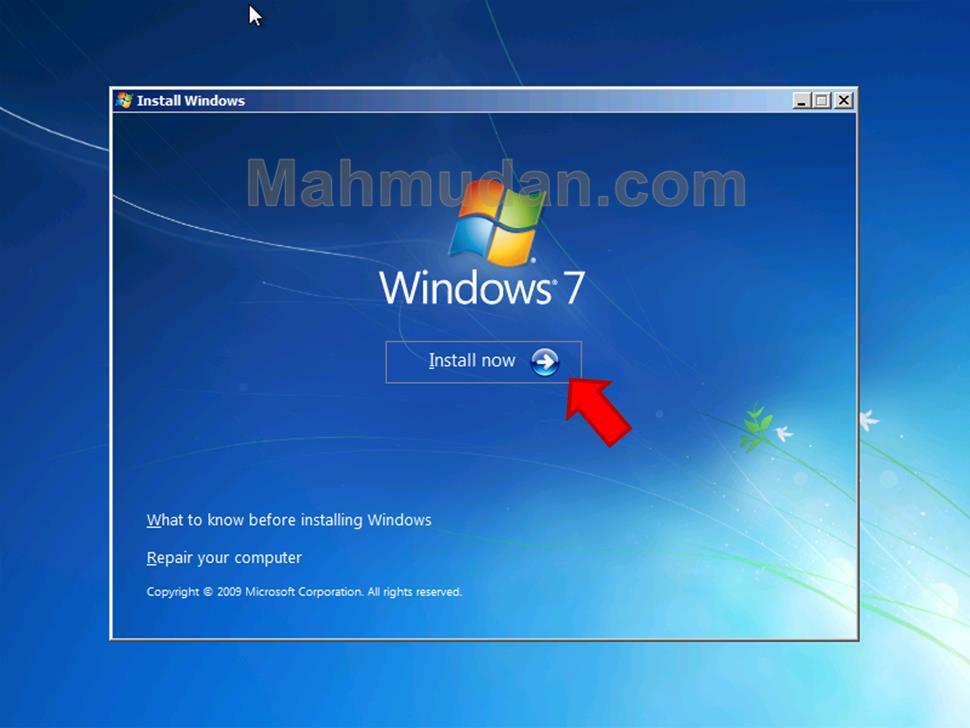
- Next, the option to use the installer media will appear, to install or to repair a Windows system 7. Because right now what you want to do is install Windows 7, then click Install now
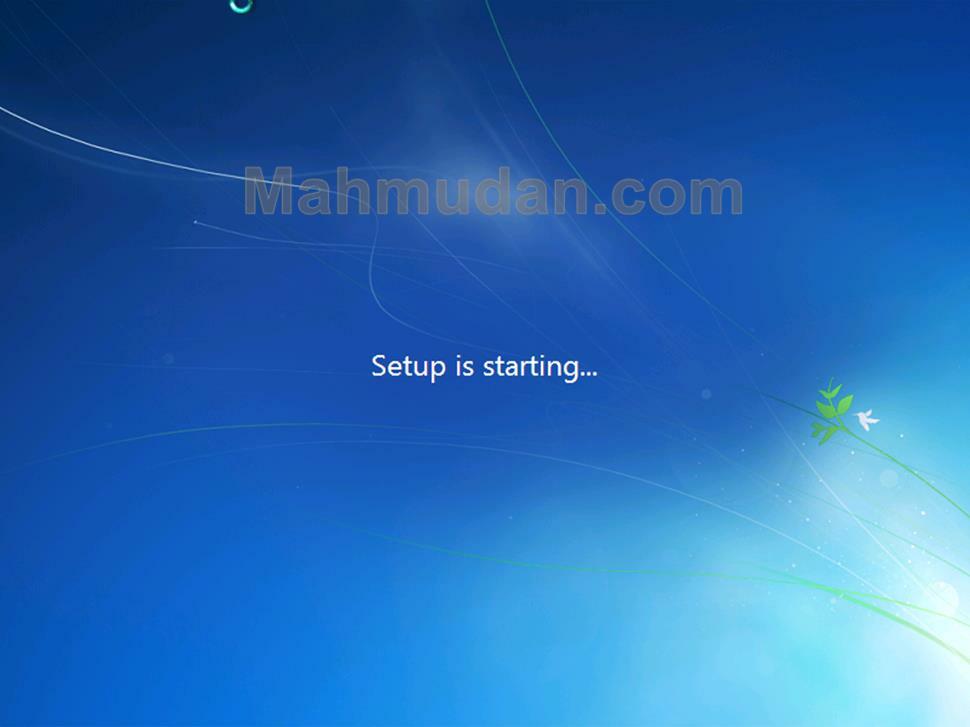
- The system is starting setup, please be patient.
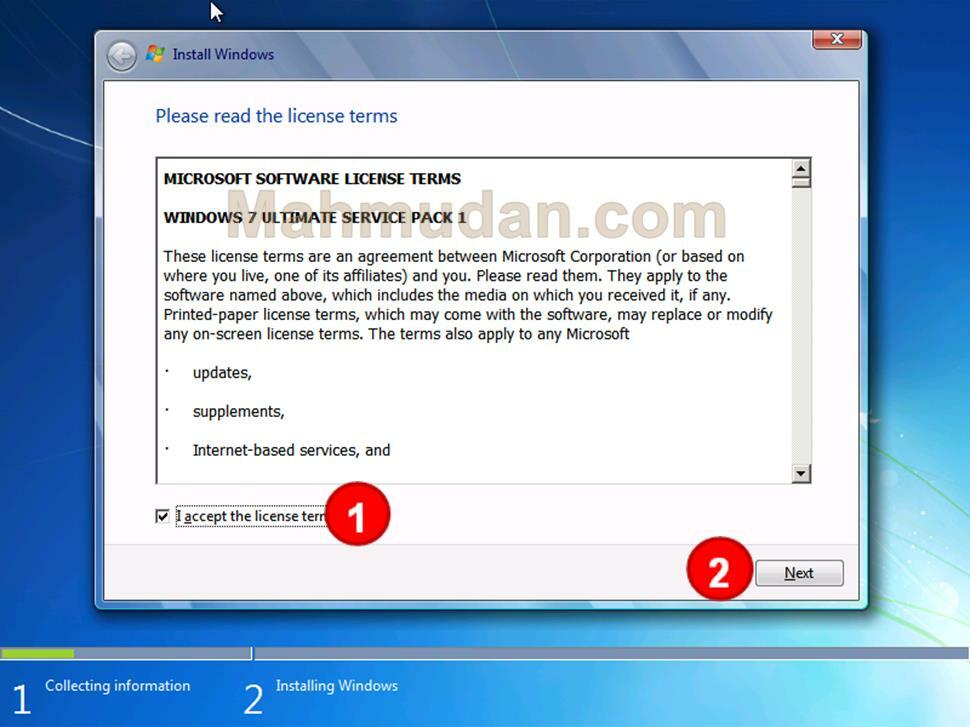
- In this section, The system prompts you to read and accept the license terms. If you agree:
- Tick I accept the license terms
- Then click Next to continue.
Steps 2: Select Install Type
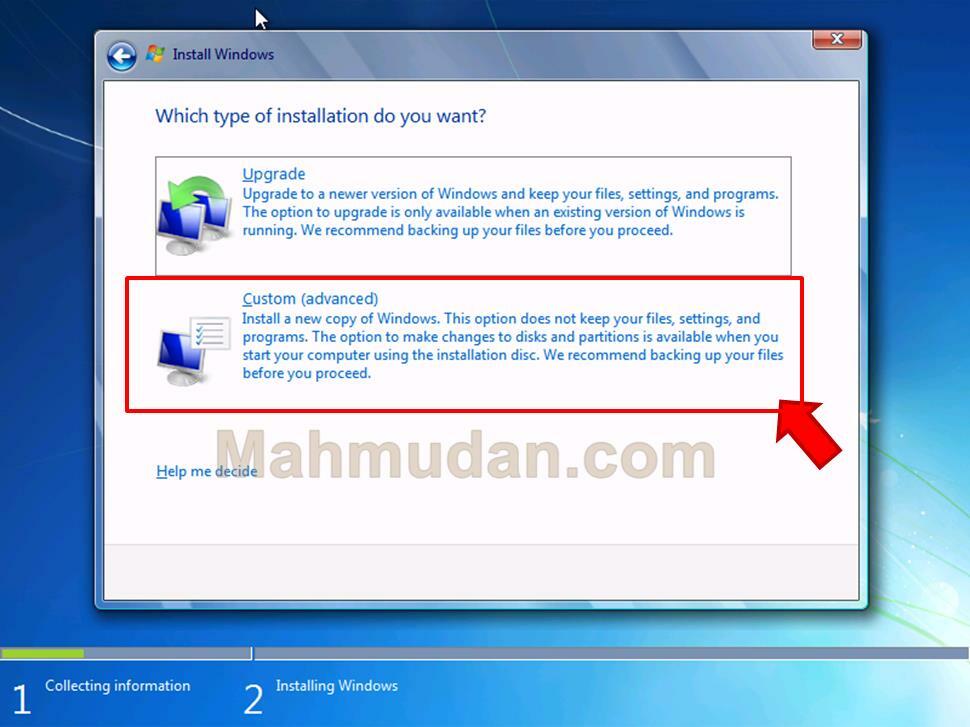
Next, the system displays a choice of the type of installation you will do. Actually, in this situation, You can only choose the type Custom (Advanced) which aims to install a new operating system into storage media.
As for Upgrade is an option to upgrade an old Windows operating system to a newer Windows operating system, with the same system settings (If possible), and it can only work when the computer is running another Windows operating system.
Therefore, click Custom (advanced).
Steps 3: Select Windows Install Location 7
Next, the system displays options on which hard disk you want to install the Windows operating system 7. According to this guide there are two possibilities, that is:
- Installing Windows 7 on the new hard disk, or,
- Installing Windows 7 on the old hard disk (you have used before)
A. Installing Windows 7 on the New Hard Disk.
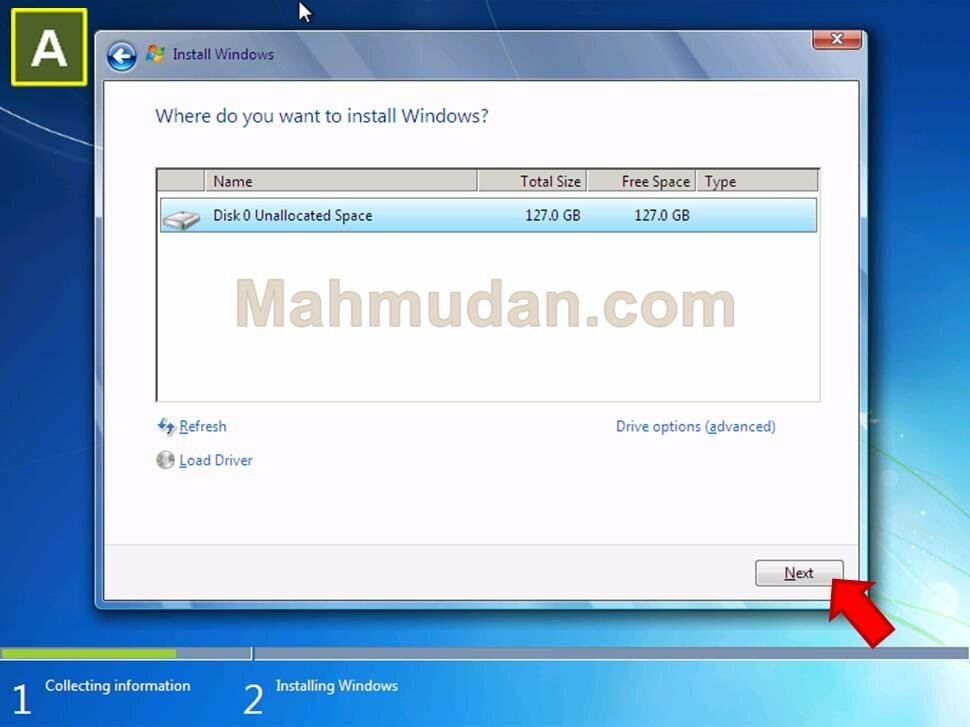
If you use a hard disk (physical or virtual) new, You will see in the list as follows:
- Name: Disk 0 Unallocated Space Total Size: xxx GB and Free Space: xxx GB.
You can proceed immediately with the click of a button Next
B. Installing Windows 7 on Old Hard Disk.
If you use a hard disk (physical or virtual) lama, You will see in the list as follows:
- Name: Disk 0 Partition 1 Total Size: 100 MB, Free Space: xyy MB and Type: System
- Name: Disk 0 Partition 2 Total Size: xxx GB, Free Space: xyy GB and Type: Primary
If you look in the list there are several partitions (example: Partition 1, Partition 2, Partition 3), You can only install Windows 7 on partitions that have a free size greater than 20GB
If you choose to install Windows 7 on the old hard disk, You can choose to format or delete the old partition so that the old hard disk is as clean as new. Or, allowing old files to remain in the old partition with the consequence that the free space capacity of the hard disk becomes smaller.
Deleting Old Partitions
IMPORTANT: deleting a partition will erase all data on that partition. Make sure you have copied important data before performing this action.
If you choose to delete the old partition, follow the steps below:
Click Drive option (advanced)
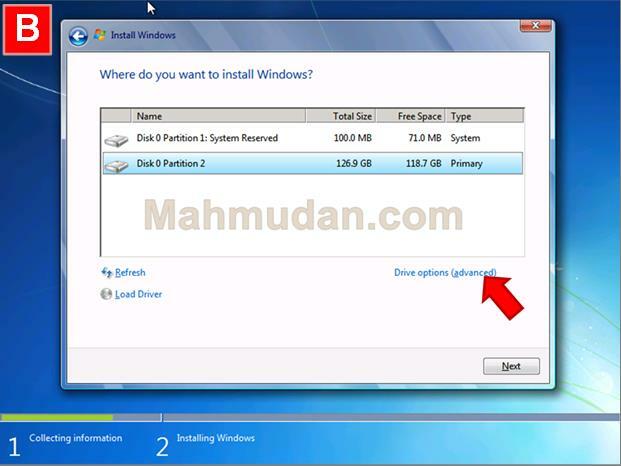
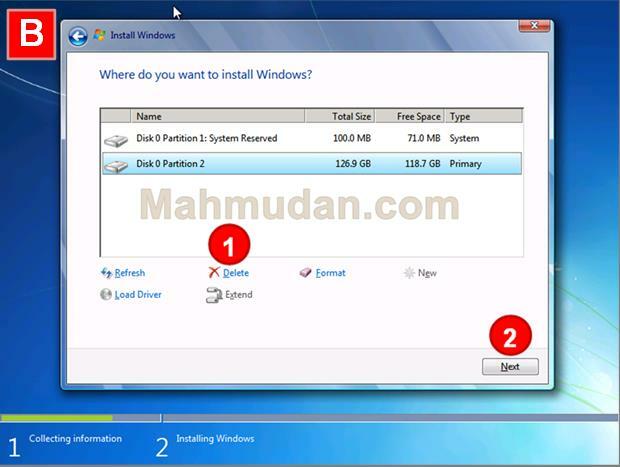
After the Drive option appears, do the following:
- Select the partition you want to delete (example: Partition 2) then click Delete
- Then click Next, then the system will start installation.
Windows Installation Process 7
Once you have determined the partition to install, the system will start installing Windows 7. Wait for the installation process to complete.
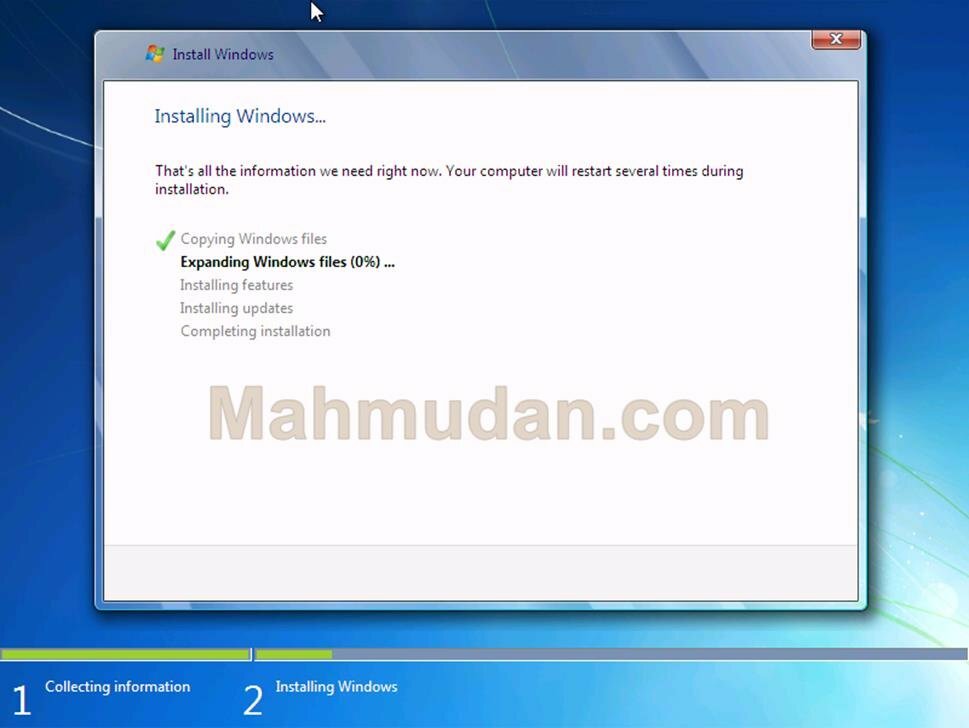
Notes: During the process of installing Windows 7, The computer may restart several times, This is normal until it arrives in parts Completing installation
Steps 4: Windows System Settings 7
In the final step of installing Windows 7, You need to set up a few things in Windows 7.
Create a Username.
- Type the name you want in the field Type a user name,
- Then click Next.
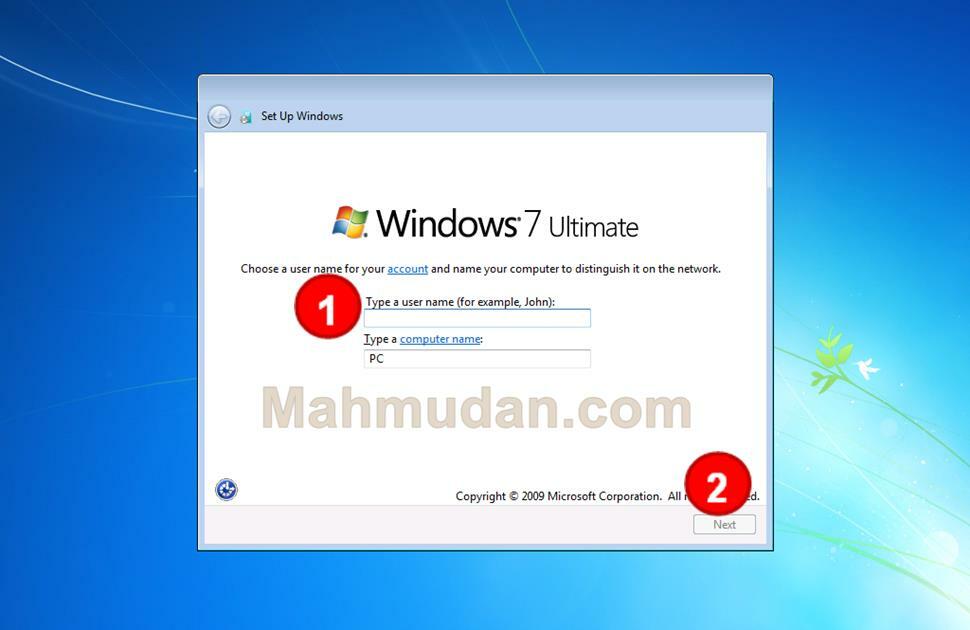
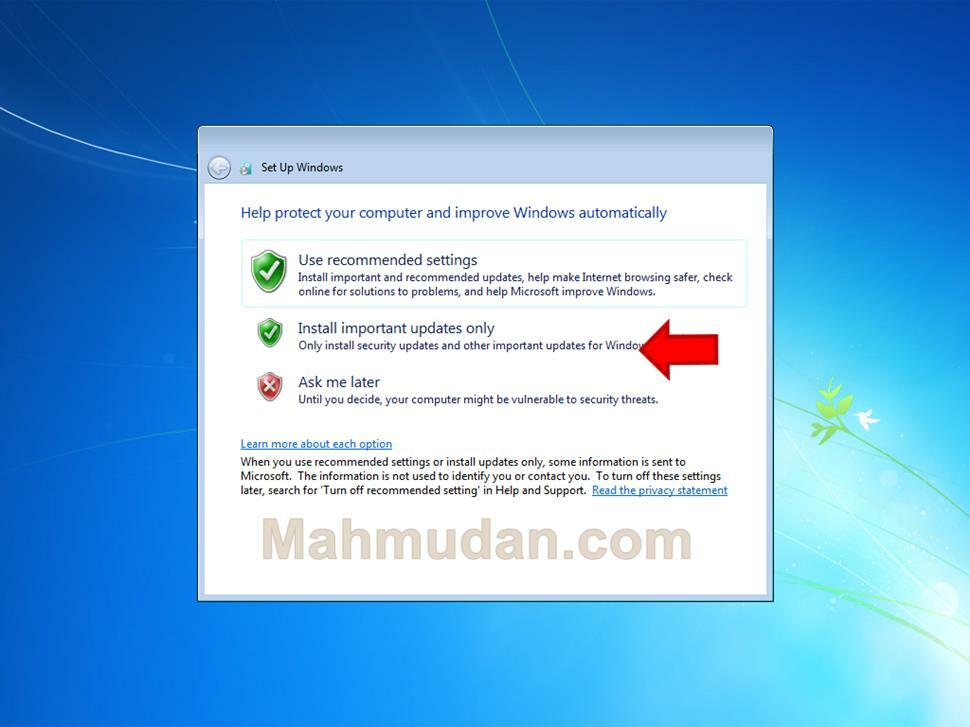
Update Options
In the update settings. Choose whatever you want, example: Install important updates only
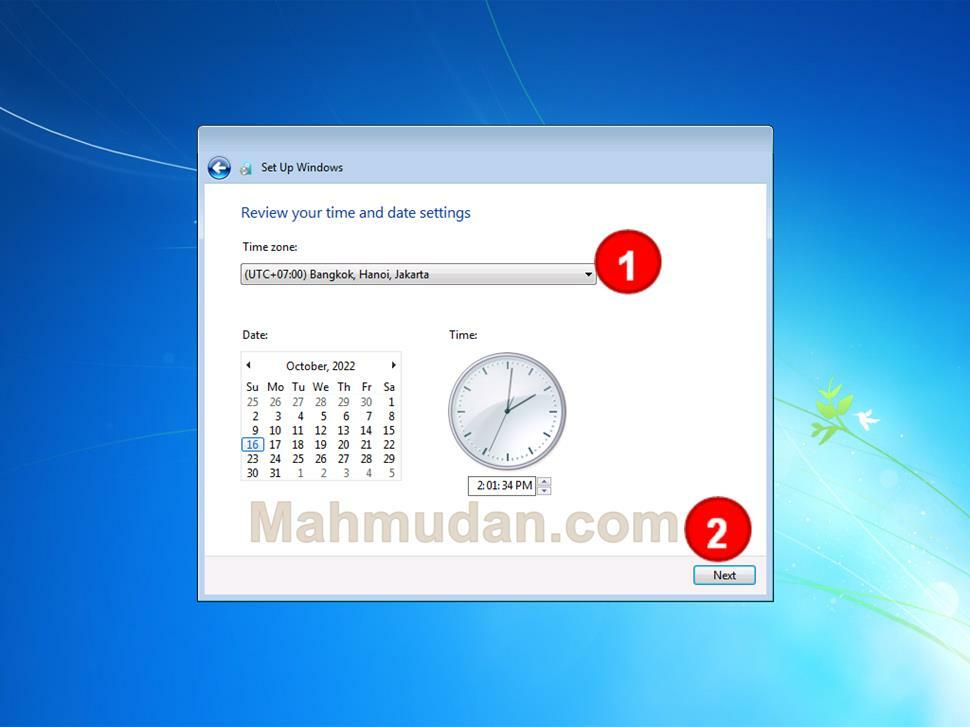
Time and Date Settings
Next, set the time and date:
- Options Time Zone, select the time zone you use, example: (UTC+07:00) Bangkok, Hanoi, Jakarta
- Then click Next
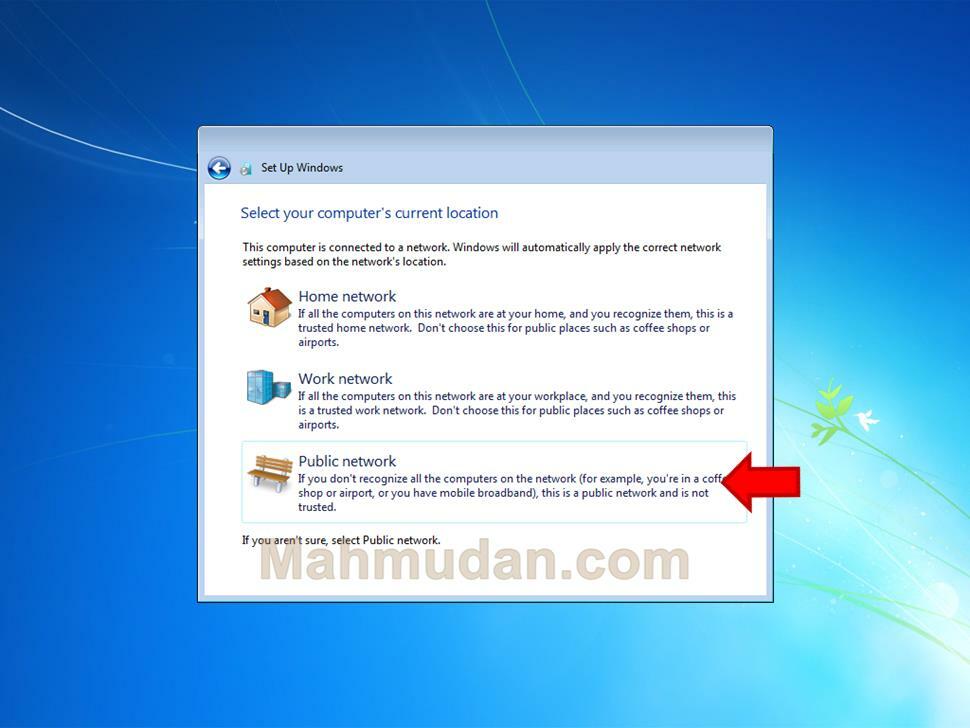
Network Settings Options
If your computer is connected to a network, this option will appear. Choose whatever you want, example: Public network
Closing
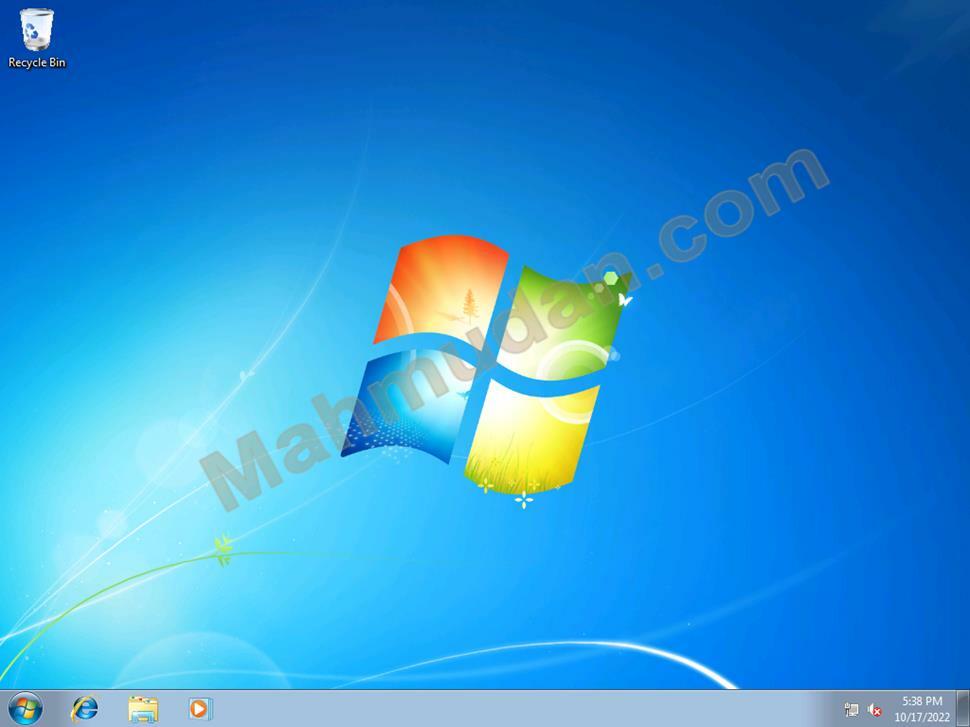
After you follow the steps to install Windows 7, as well as several settings as mentioned above, Your computer will display the Windows desktop screen 7. This signals the process of installing Windows 7 have been completed.
Furthermore, You need to install the driver, other programs and applications you need.
Have fun using Windows 7, you need to know that Windows 7 is no longer supported so you won't get updates from Microsoft. This has a huge impact on the security of your system.
Hope it's useful.
