This guide on how to draw a house with Word is suitable for you and your children. You can make a picture of a house as learning material for children or as a design for the house you want to build.
You can make a simple drawing of your house by utilizing the application that you often use, namely Microsoft Word. Microsoft Word or Word provides a tool that allows you to create a shape, This tool is located on the tab Insert -> Shapes.
With Shapes, You can add a shape to a document Word or combine several shapes to create a more complex picture or shape, for example a picture of a house, building, mobil, location plans and so on according to your creation and imagination.
In this tutorial we will practice making a drawing of a simple house with Microsoft Word 2010. However, You can also practice using a newer version of Microsoft Word.
List of contents:
In this practice, the picture of the house we will make consists of 3 main part, namely the foundation, walls and roof.
Steps to Draw a House with Word
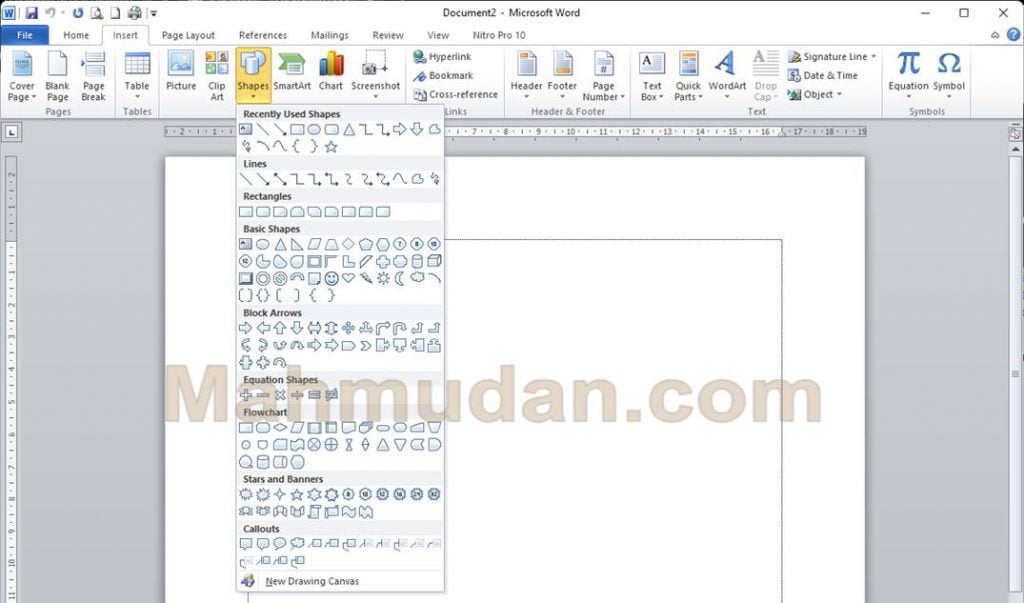
Open Microsoft Word then click menu Insert then click Shapes. When you click Shapes, You can see the various shapes that we can use to create images.
1. Make a picture of the house foundation
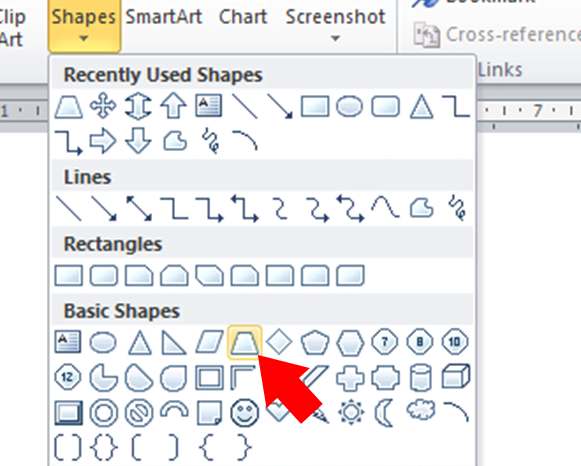
We will start by making a picture of the house foundation in a trapezoidal shape. See in section Basic Shapes then select Trapezoid.
Click anywhere on the document Word, then you will see a shape like the image below
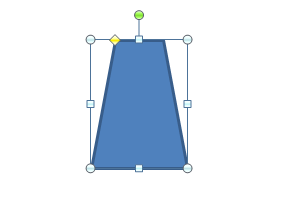
You have successfully created a trapezoid shape, but the length and width are not appropriate so it doesn't resemble the picture of the house foundation, therefore we need to change the size.
2. Changing The Size And Position Of Shapes
Select the shape you want to change the size and position of. When you select a shape or picture in Word, Dots will appear on each side, just say his name Resize Dot
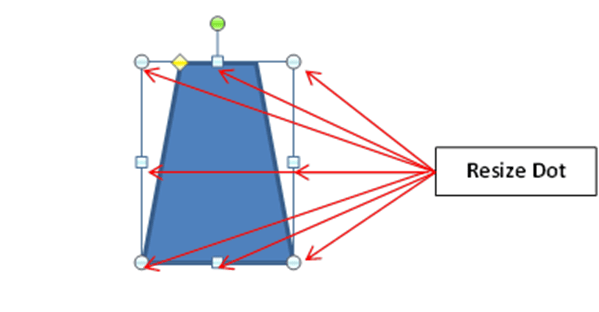
Move the pointer to one Resize Dot, until the pointer turns into a double arrow (Resize Pointer active).
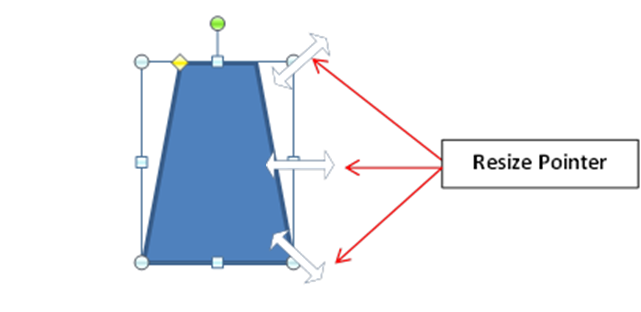
Moment Resize Pointer active, click and drag the pointer to resize it.

To change position, move the pointer to the center so that the pointer changes to a four-way arrow (Move Pointer active) then click and drag to the desired position.
3. Making Home Wall Pictures
The wall we will make is rectangular, click the menu Insert then click Shapes, in section Rectangles click Rectangle
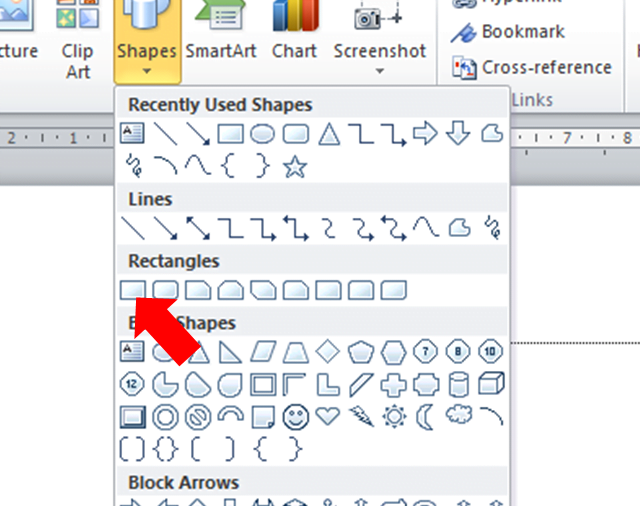
We can create the shape of a house wall with the starting point above the picture of the house foundation that has been created by directing the pointer directly above the foundation..

Click and hold and drag the pointer up, then to the right along the foundation a little less. If the size and position of the wall image are not as desired, You can change its size and position by repeating steps number 2.
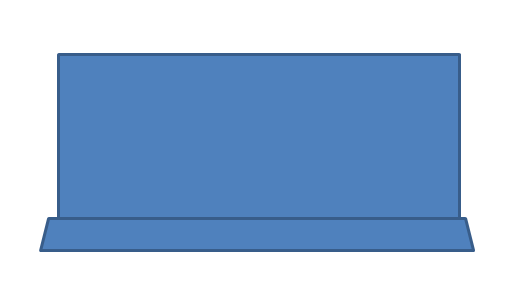
Until here, we have had a shape resembling the picture of the foundation and the wall of the house, Next is to make a picture of the roof of the house.
4. Make a picture of a house roof
The roof we will make is a triangular shape, click the menu Insert and click Shapes, in section Basic Shapes select Isosceles Triangle
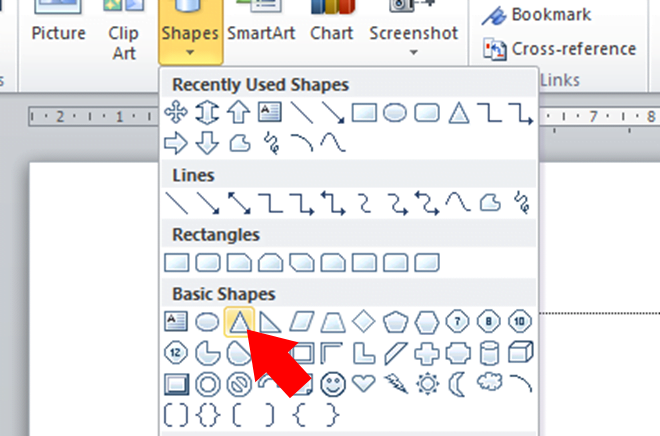
Place the triangle shape on top of the wall shape, so the result is more or less like the picture below.
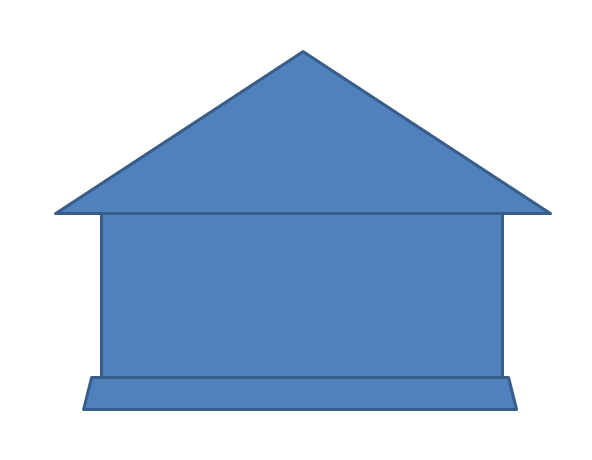
Now we have some shapes arranged in a Word document. This shape almost resembles a picture of a house consisting of a foundation, Wall, and roof. The next step is to change the color of each shape and add images of other parts of the house.
5. Applying Pattern and Color to Shapes
In Word, a form consisting of 2 part is the content (Fill) and outline (Outline), now we will give the appropriate color to each shape we have made.
Select a shape, then right click then click Format Shapes.
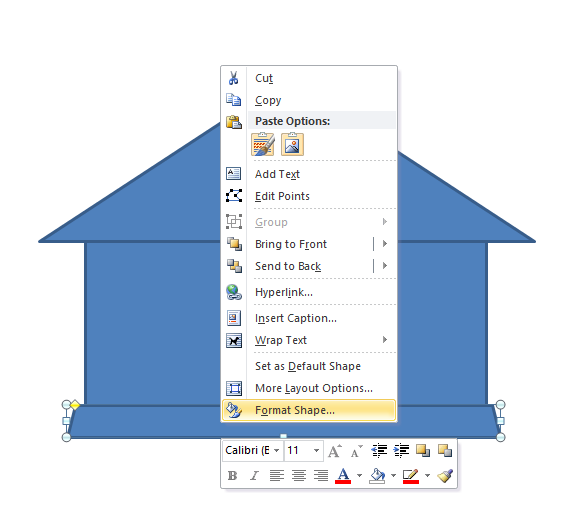
On the dialog box Format Shape, There are many options that can be applied to a shape. On this occasion we will only apply it to the content section, line color and line style.
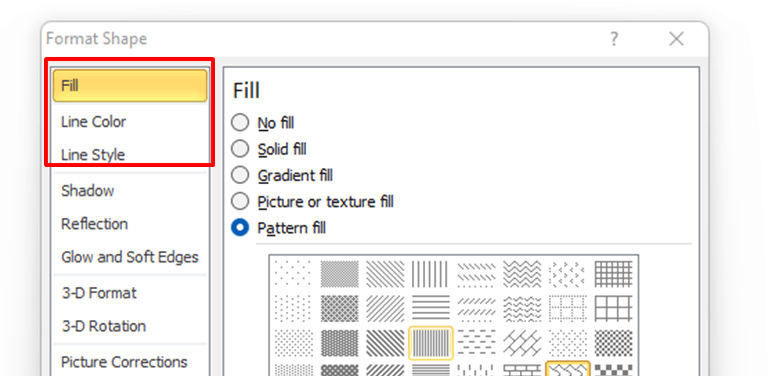
For foundation drawings, in section Fill we give a pattern or style. Click Pattern fill, then select the appropriate pattern, for example Shingle which resembles the shape of stacked stones. On Foreground Color And Background Color You can choose according to taste, for example gray or black.
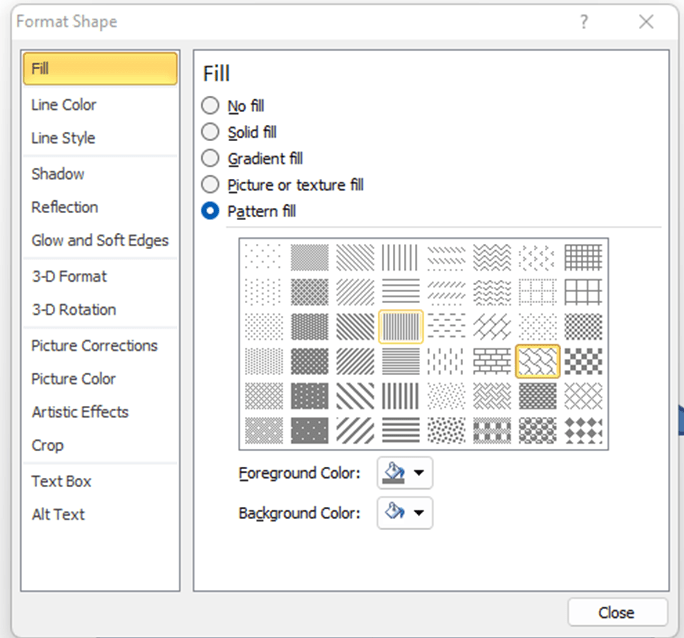
In section Line Color, select Solid Line, on Color choose black.
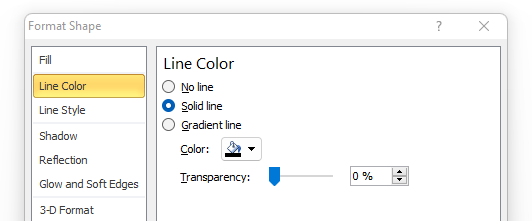
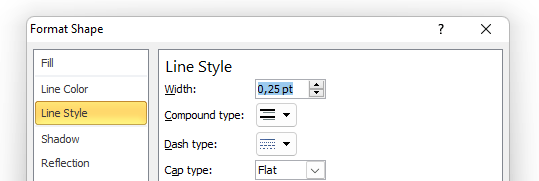
Part pad Line Style, change Width to 0.25pt
If it is already, close the window Format Shape, the results will look like below. We have a shape that resembles a picture of the foundation.
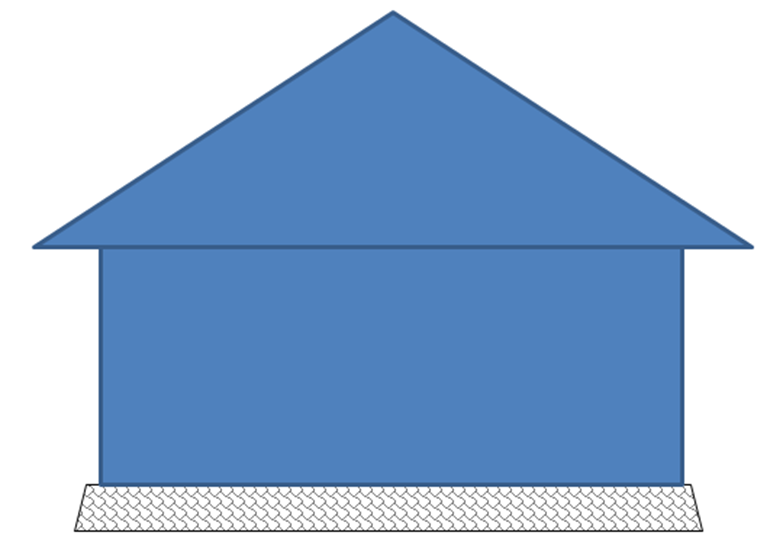
Next, you can set the color and pattern for the walls and roof by repeating the steps number 5 on.
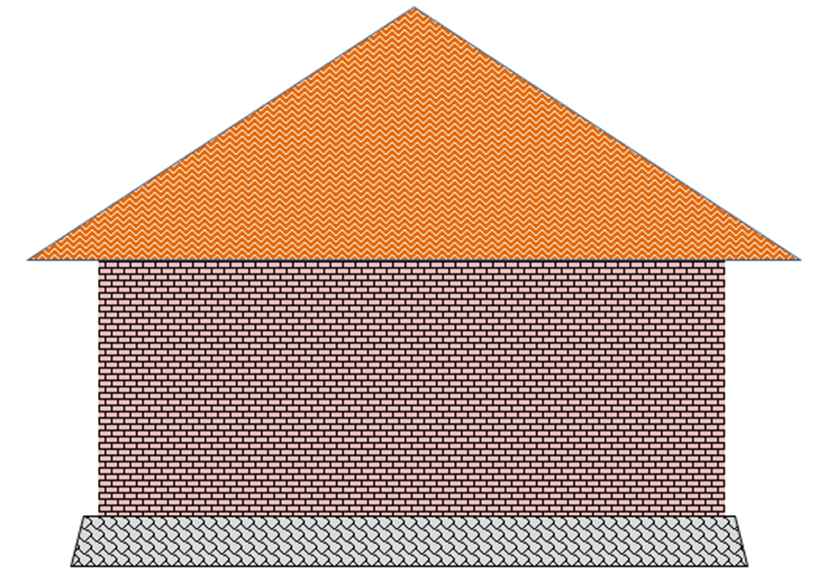
If you want the walls of your house to look like bricks, You can choose Horizontal Brick as a pattern of contents in the section Pattern Fill. For the roof, You can use Zig Zag which looks like a tin roof. If it is finished, the result will be approximately as below.
Drawings for the three main parts of the house have been completed, next is to make pictures of small parts such as doors, windows and so on.
6. Make a drawing of the doors and windows of the house
To create pictures of doors and windows, You can use a rectangular shape or another shape. On this occasion, Door and window images are created using shapes on the part Flowchart -> Predefined Process.
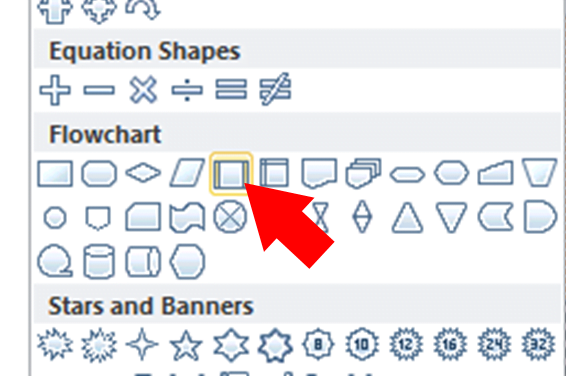
Adjust the size and color of the selected shape by repeating the steps number 2 And number 5, until it becomes like below.
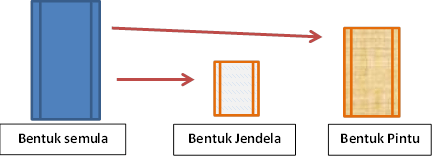
You can copy the above shape into as many window images as needed, change the size and color to create the shape of the door and ventilation. Place it in the right position until the result is more or less like the picture below.
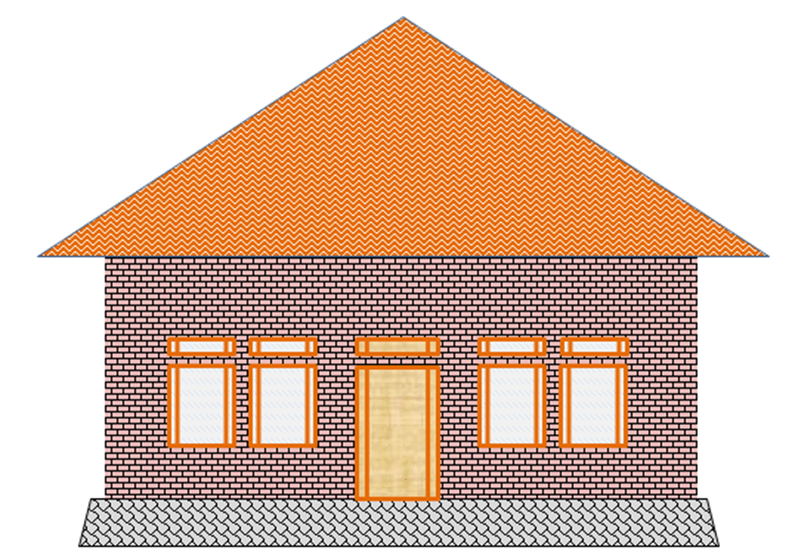
Drawing a house with Word is almost complete, You can add other parts, for example plants to make the image of your house more beautiful.
Besides Copy-Paste, a new shape can be created by rotating (Rotate) original form and or by merging into Group.
7. Rotating Shapes
We will practice rotating a shape to create images of plants and pots. Select a shape, for example Explosion 1 which is located in the section Star and Banners as a picture of a plant leaf, copy and paste until it becomes 2 fruit.
Select one of these shapes, when you select a shape, will appear Rotate Dot. Move the pointer to Rotate Dot until the pointer changes to Rotate Pointer, click then drag right or left to rotate the direction.
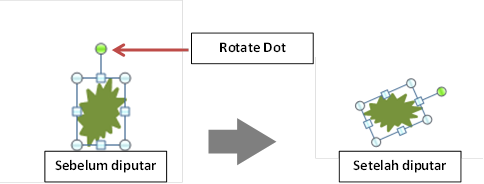
Make another trapezoid shape then rotate it so it looks like a plant pot.

Currently we have three new forms, two leaf shapes and one pot shape, we will merge it in Group
8. Combining Shapes in Groups
Move the position of the leaf shapes and pot (click and drag) so that they are close together so that they resemble the shape of a plant. Select the three shapes by pressing and holding the button Ctrl on the keyboard, then click on the shapes.
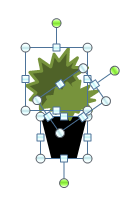
Right click on all three then select Group then select Group.
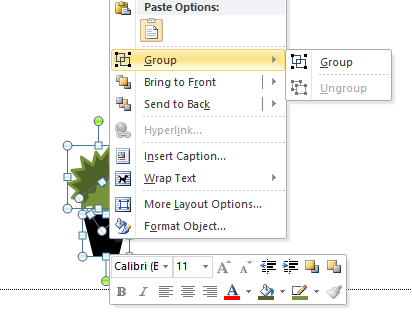
When several shapes have been combined in a group, they become a new form, can be copied or played at once. If it succeed, the shape of leaves and pots that have been combined into a picture that resembles a plant.
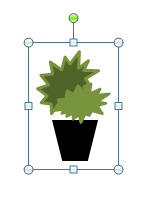
Copy-Paste picture of the plant until it becomes several fruits, then place it in the appropriate position to beautify the image of the house. Also add other accessories to make it look more real.
Final Result of House Drawing
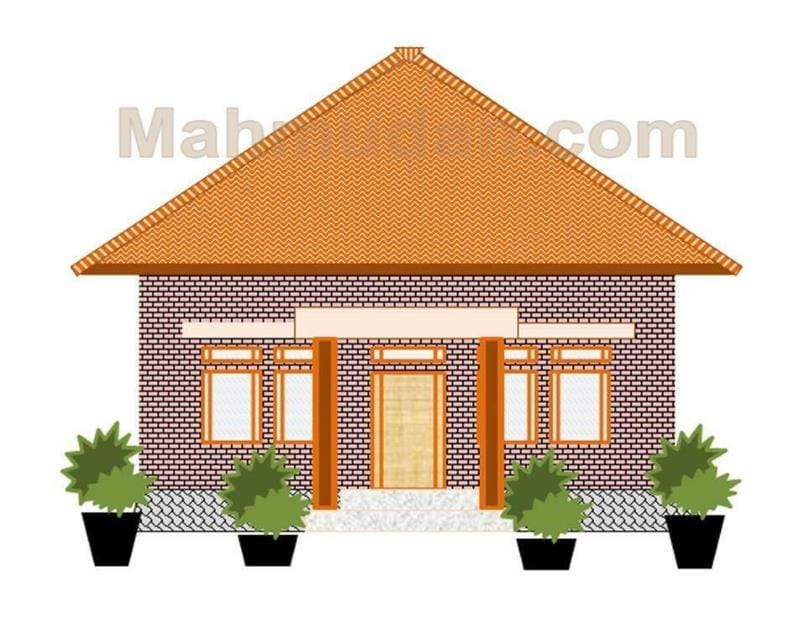
Finally we succeeded in drawing a house with Word, Download a simple house drawing as coloring material for PAUD and Kindergarten school children.
Watch the video on how to draw a house on This YouTube channel
Hope it is useful.

Mantaaap…..continue to develop with other knowledge
cool bro
Bang Mudan, Request a tutorial for making presentations, bro…
Thank you in advance
Great, beneficial
If you can accompany it with the video, yes bosq By Andri