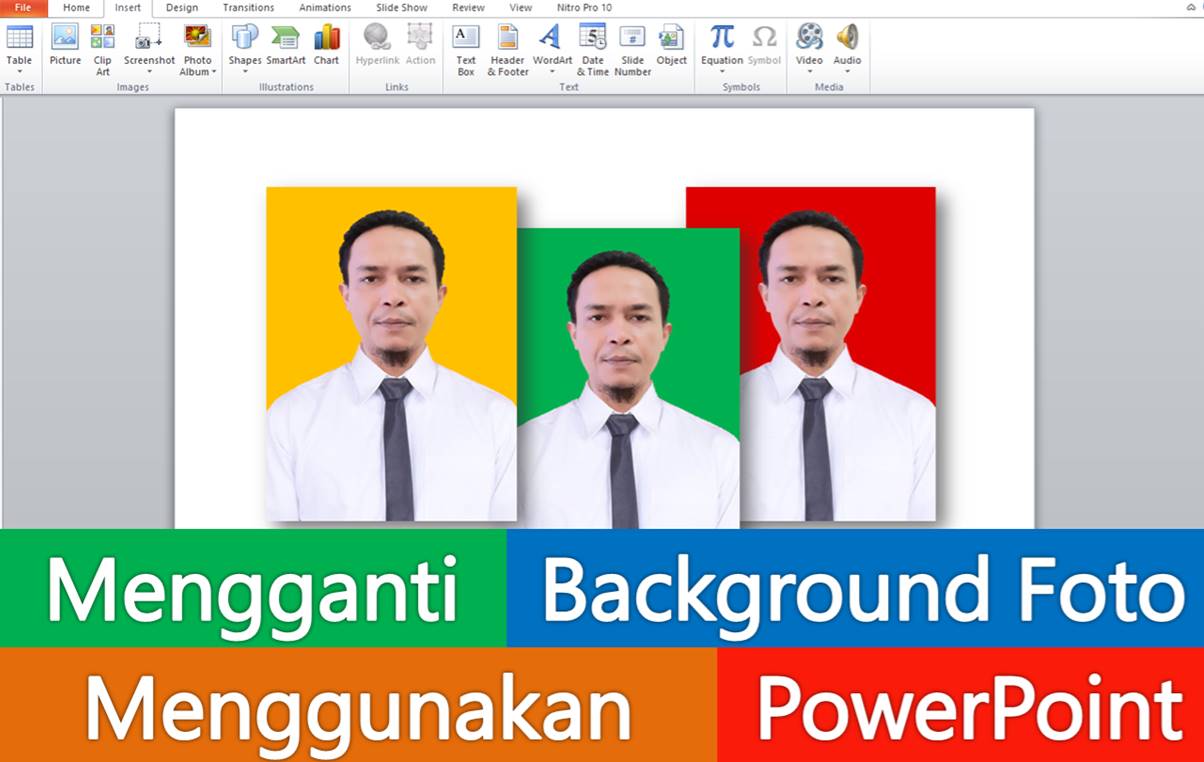
No need for complicated applications, You can edit photo backgrounds in four easy steps using PowerPoint. You can replace the red photo background with yellow, green or with a picture.
The practice in this guide is very easy to do because it uses a frequently used application, namely Microsoft PowerPoint. But remember, The results you will get are commensurate with the effort you put in.
How to Edit Photo Backgrounds Using PowerPoint
List of contents
Remove Old Background
To change the photo background, The first step you have to do is delete the old background. learn How to remove image background with Powerpoint.
After successfully removing the photo background, You can add a shape or an image to replace the old photo background with a new one.
Add Shapes
Adding Shapes
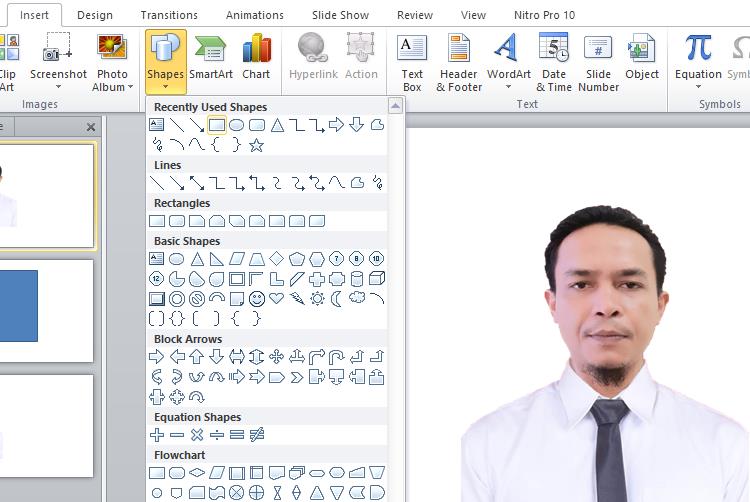
- Click Insert then click Shapes then select the rectangle. Make a rectangle the same size as the photo and position it parallel to the photo.
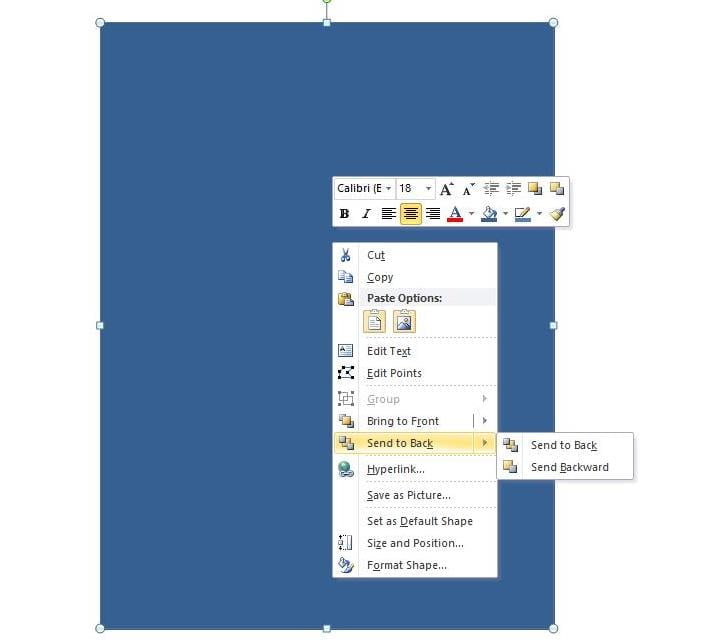
- Right-click the rectangle you have created and select it Send to Back so that the rectangular shape is behind your photo.
After adding a shape as a replacement for the photo background, The result will look like the image below. A newly created shape has a default color of blue so the background color of your photo is blue.
You can change the background color or shape color to another color.

Change Shape Color
After you create a photo background from a shape, You may want to change the color of the shape, because by default the shape you create will have a blue color.
To change the color of the shape, do the following:
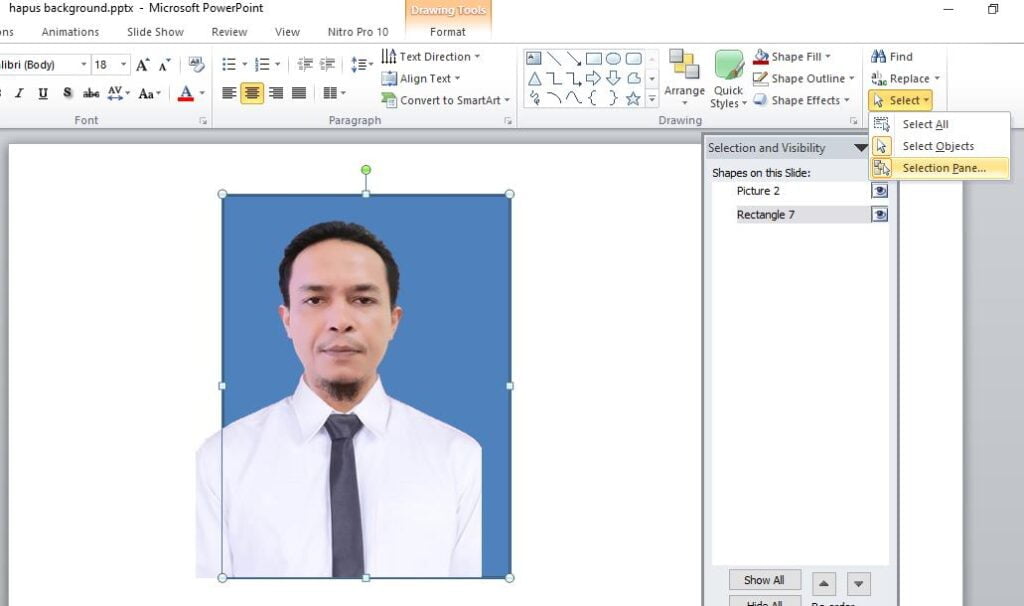
- Select the rectangle you created previously, if you are having trouble selecting the rectangle because it is behind the photo, on the tab Home click Select then select Selection Pane, then click Rectangle. Or you can also move the photo slightly to the left or right side then click on the rectangle.
- After selecting the rectangle, click tab Format then click Shape Fill then select the color you want
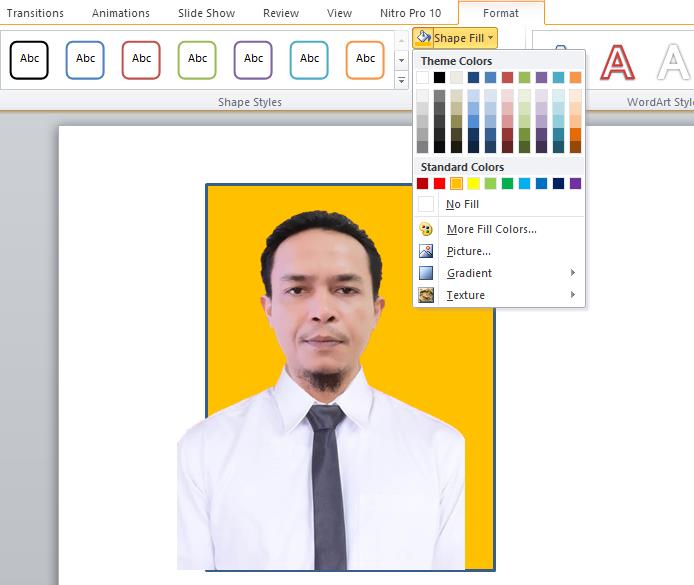
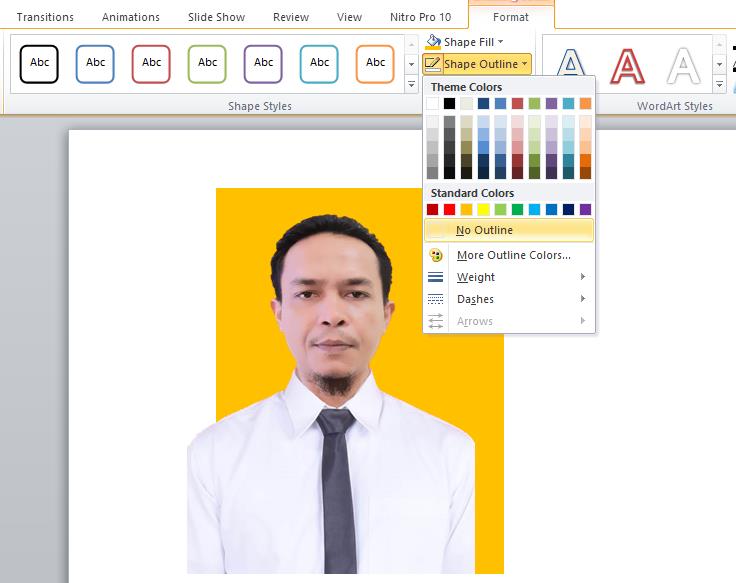
- Because the color of the frame or background border is not the same as the background, You may need to replace it, click Shape Outline then choose the same color. If you want no border then select it No Outline
Add Image
Apart from adding a shape as a photo background, You can also create a photo background by adding an image behind the photo.
To add images to PowerPoint, You can use the same method when Insert images into Word.
After inserting the image, set the position and size of the image to match the photo, then also set it so that the image is behind the photo by following step number 2 on. Then after that you can go straight save photos.

Save Photo
To save new photos and backgrounds that you have added, Position the photo parallel to the background then do the following:
- Combine photos with background. On the tab Home click Select then select Select All. Once both objects are selected, right click on the object and click Group then select Group
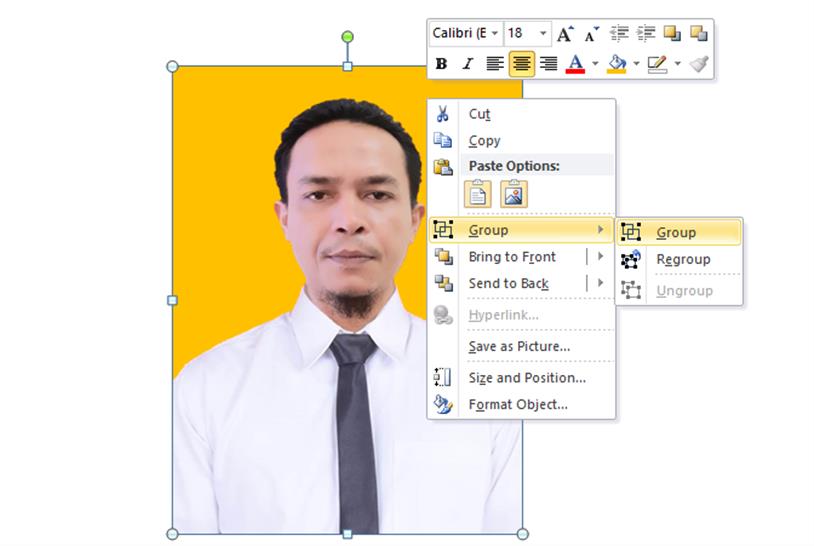
- After successfully combining the photos with the new background, now you can save it as an image, right click on the object and select Save as Picture
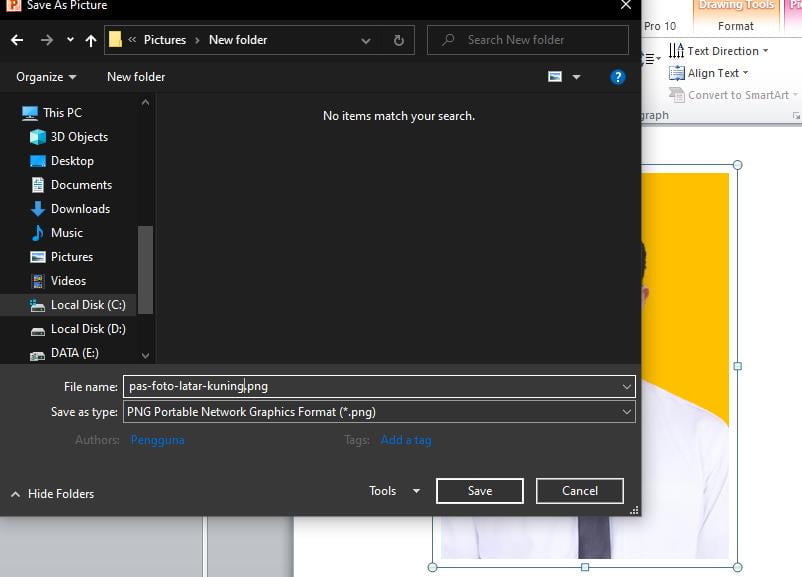
Happy, You have successfully edited the photo background using only PowerPoint.
Please watch my other tutorial videos atYoutube
Hopefully this simple guide is useful

